How To Make Every Photo Look Great & Which Presets Not To Buy
September 23, 2019
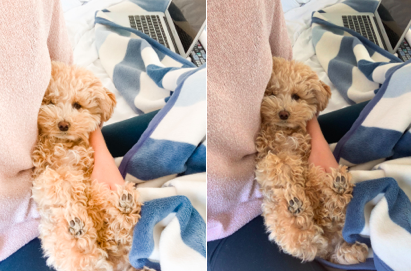
Hi there! I’ve been working on this blog post for a little while now and am so exited to finally share this with you! Let me know if I should do more posts like these with helpful tips/tricks. Also, I don’t intend this post to be just for bloggers. This is for anyone looking to step up their photo game with minimal efforts. Keep scrolling to find out how to make every photo you take look great and which presets not to buy!
For anyone reading this who is confused, let me take a second to catch you up on what presets are! Presets are like pre-made filters for your photos. They allow you to achieve a more cohesive look/feel with your photos (which is why bloggers love them), but they also let you turn an average photo in to a wow photo! It’s really cool!
With that being said, not all presets are equal. There are plenty of presets that aren’t worth your money (yes, they cost money) and are only able to make amazing photos look even better. In my opinion, a really great preset is able to turn a photo with sub-par lighting into a photo that looks like it has great lighting! I’ll show you what I mean below.
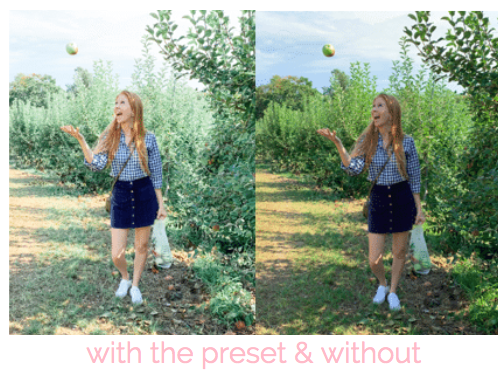
For the first two years of blogging I didn’t invest in any presets and I really regret that decision. Presets can take your photos to the next level in seconds. It’s a no-brainer in the blogging world! But again, even if you’re not a blogger, but just love taking photos, then you’re probably going to want to check out the presets I love below because they make your photos look amazing!
In order to use the presets you’ll have to download the free Lightroom Mobile app on your phone. Even if you don’t end up buying any presets I highly recommend downloading this app to edit your photos with. It’s my favorite (and I’ve tried a lot of apps!).
When you buy a preset you’ll receive it via email with plenty of instructions on how to download the preset and put it on your Lightroom Mobile app. It’s easy, trust me! If I can do it, you can do it. Start to finish it shouldn’t take more than 10 minutes. Then you’re all ready to start editing your photos with one click!
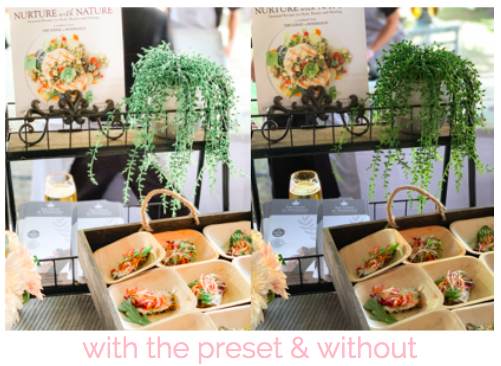
Presets Not Worth Buying
The first presets I ever bought were by Dreamy Presets. I saw a couple bloggers with over 200k followers using them so I figured it was worth a shot! They cost $69 for 1 preset and they have all different kinds for whatever aesthetic you’re going for. Honestly, I really wanted to like them, but I didn’t. I was disappointed in how the presets made my photos look, which was nothing like what their example photos looked like. I also had to do so much editing after applying the preset, which I didn’t mind doing, but still wasn’t able to achieve the look I was hoping for. *None of the photos in this post were edited with the Dreamy Presets.
Presets Worth Buying
After my experience with the Dreamy Presets, I was reluctant to invest in new presets, worried the same thing would happen again. I followed along with an Instagram account, lightandairyphotog, for a little while and after seeing photo after photo pop up on my feed and LOVING the way they looked I finally decided to buy theirs.
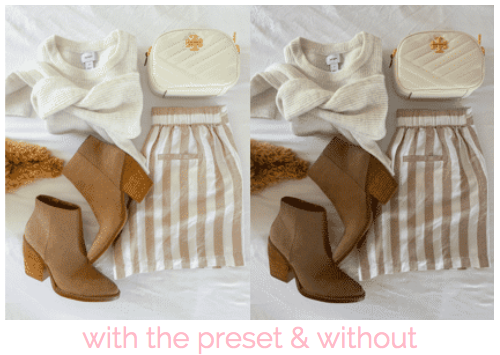
For only $47 (but right now you can get 20% off with HELLOFALL20) you get over 10 different presets to use on the mobile Lightroom app. In full disclosure, I don’t use all of the 10 presets, and I feel like some of them make the photos way too bright, but the “Half Power” preset seems to be perfect for most of my photos and does a great job of achieving the light and airy look that I’m going for! Shop their presets here!
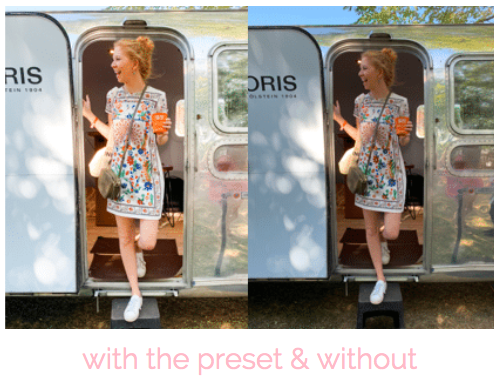
So what do you guys think? Was this helpful? I really do love these presets and it makes photo editing so much easier and enjoyable! In full disclosure this blog post is not sponsored. I paid for these presets with my own money. Just wanted to share what I’ve learned with you guys!!
Before you go, check out these other posts!
- Summer Sushi Party Featuring a Floral Sushi Tower!
- Our Mirbeau Inn & Spa Rhinebeck, NY Spa-cation Recap
- Our 24 Hour Itinerary In Mystic, CT!
- 5 Tips To Score Designer Furniture on Facebook Marketplace
- The BEST Face Sunscreens for Summer 2023

Leave a Reply Cancel reply
Designed by Gillian Sarah
Images by Helen Phillips
Copyright 2023 Life on Phillips Lane
Privacy Policy //
in your home, your closet, & beyond
